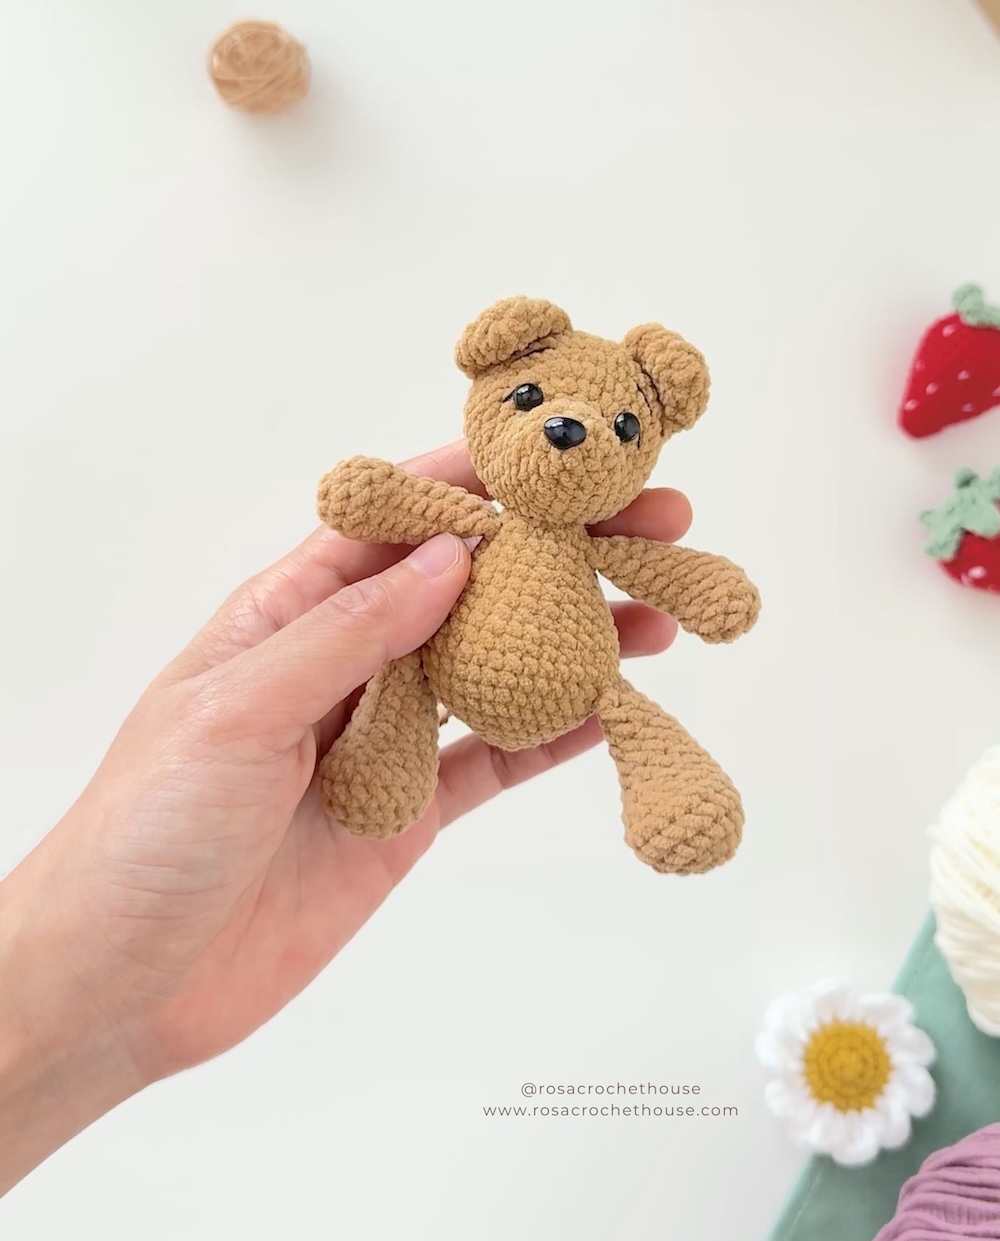
This mini bear crochet pattern free tutorial walks you through every step, so that even if you’re just starting out with amigurumi, you’ll be able to finish your very own bear crochet on the first try.
Materials & Tools
Yarn: Polyester chenille yarn. You may use any type of yarn you prefer. Crochet Hook: 2.0 mm or sizes appropriate for your yarn. Stuffing: Fiberfill. Tools: Yarn needle, scissors. Accessories: 6 mm safety eyes, 1 × 6 mm safety nose.
Abbreviations
MR – magic ring ch– chain st– stitch / stitches sl st – slip stitch sc – single crochet inc – increase (2 sc in one stitch) dec – invisible decrease (or decrease) Rnd – round (…) * x – repeat the instructions inside the parentheses x times. (12) – number of single crochet in the row
Step-by-step Introduction
Legs (make 2)
Rnd 1: MR, 6 sc (6) Rnd 2: 6 inc (12) Rnd 3: (1 sc, 1 inc) * 6 (18) Rnd 4 – 5: 18 sc – 2 rounds (18) Rnd 6: 5 sc, 4 dec, 5 sc (14) Rnd 7: 4 sc, 3 dec, 4sc (11) Rnd 8 -12: 11 sc – 5 rounds (11) Stuff with fiberfill. Finishing: Fold the leg and crochet 5 sc to close. Make sure the closing stitches are centered. Fasten off, cut the yarn, and hide yarn end.
Arms (make 2)
Rnd 1: MR, 6 sc (6) Rnd 2: 6 inc (12) Rnd 3: 12 sc (12) Rnd 4: 3 sc, 3 dec, 3 sc (9) Rnd 5 – 10: 9 sc – 6 rounds (9) Stuff with fiberfill. Finishing: Fold the arm and crochet 4 sc to close. Make sure the closing stitches are centered. Fasten off, cut the yarn, and hide yarn end.
Ears (make 2)
Rnd 1: MR, 6 sc (6) Rnd 2: 6 inc (12) Rnd 3: (3 sc, 1 inc) * 3 (15) Finishing: Fold the ear and crochet 7 sc to close. Leaving a long yarn for sewing.
Tail
Rnd 1: MR, 6 sc (6) Rnd 2: 6 inc (12) Rnd 3: (1 sc, 1 dec) * 3 (9) Stuff with a little fiberfill. Finishing: Leaving a long yarn for sewing.
Body
Rnd 1: MR, 6 sc (6) Rnd 2: 6 inc (12) Rnd 3: (1 sc, 1 inc) * 6 (18) Rnd 4: (2 sc, 1 inc) * 6 (24) Rnd 5: (3 sc, 1 inc) * 6 (30) Rnd 6: (4 sc, 1 inc) * 6 (36) Rnd 7: 36 sc (36) In the next round, we will join the legs to the body. Rnd 8: 7 sc, work 5 sc across the leg, 12 sc, work 5 sc across the leg, 7 sc (36) Rnd 9: 36 sc (36) The next two rounds are worked a little differently, we will work them as one continuous round Rnd 10 and 11: 11 sc, (2 sc, 1 dec)*3, 10 sc, 3 dec, 29 sc (30) Rnd 12: (3 sc, 1 dec) * 6 (24) Rnd 13 – 14: 24 sc – 2 rounds (24) Rnd 15: (2 sc, 1 dec) * 6 (18) Rnd 16: 18 sc (18) Stuff with fiberfill. In the next round, we will join the arms to the body. Rnd 17: 3 sc, work 4 sc across the arm, 5 sc, work 4 sc across the arm, 2 sc (18) Rnd 18: (1 sc, 1 dec) * 6 (12) Finishing: Fasten off, leaving a long yarn for sewing.
1. Insert the needle between Rounds 5 and 6 at the center of the head, leaving a short tail for tying later. 2. Bring the needle out at the outer corner of the right eye. 3. Insert the needle at the inner corner of the right eye and bring it back out one round below the starting point. 4. Repeat Steps 2–3 for the left eye. 5. Gently pull both yarn ends until the eyes are symmetrical, then tie a secure knot. If necessary, repeat the process until you are satisfied with the shape of the eyes. 6. Insert the needle into the same starting point. Bring it out at the inner corner of the left eye. 7. Insert the needle at the corresponding point near the right eye and return to the starting point. 8. Gently pull the yarn and tie a secure knot and hide the ends inside the head.
Sew the Eyelashes, Eyebrows, Ears and Tail
1. Using black yarn, embroider the eyelashes and eyebrows. 2. Sew the ears between Rnds 11 and 12, leaving 4 stitches between them and positioning them symmetrically. 3. Sew the tail to the center of the back.
Sew the Head to the Body
Pin the head to the body between Rnds 9 and 12 and sew it in place. Add extra stuffing to the neck area for better support. Finish sewing and hide the yarn end.


Leave a Reply